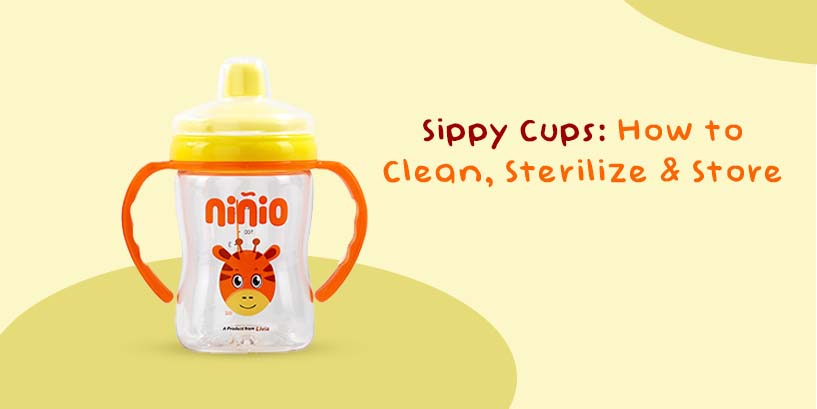
Your child has taken to their sippy cup after some trial and error. Most children love to carry their sippy cup around, taking a sip now and then until they run out of whatever yummy goodness you have filled. But, can you sterilize sippy cups? what is the right way to clean, sterilize and store sippy cups?
Use warm, soapy water to clean all the nooks and crevices of the cup. Then, sterilize the cup and lid using hot water or the microwave. After the cups are clean and sterile, wipe them dry using a clean cloth or a tissue and store them in a clean cabinet, away from water or oil.
Babies tend to carry their sippy cups wherever they go and, more often than not, keep dropping them—the dirt, bacteria, and germs on the ground stick to the sippy cup. Also, if they roll under some furniture and it takes you a couple of days to find it, mold might grow inside the cup. This is similar to mold growing inside any wet container that has not been used for many days.
All of these factors make it very important to wash out your child’s sippy cup thoroughly. While the crevices and grooves may be quite challenging to get to and, as a result, difficult to clean, there are some ways to make sure you can prevent the growth of microorganisms and mold inside your child’s sippy cup.
The right way of cleaning your child’s sippy cup
Various steps are involved in keeping a sippy cup safe from mold and other microorganisms. The simplest and most common way to clean the sippy cup is by following these steps-
- Remove the cap from the cup. Rinse it thoroughly in warm water.
- Using your finger or a brush, clean all the grooves.
- Check for any residue on the sipper and clean that.
Rinse the sippy cup after every use: You should develop good practice to rinse the cup after every use. Rinsing it immediately after use removes some milk, formula, or juice in the cup. This reduces the food residue left behind in the cup. Less food residue means less food for mold to eat and grow.
Disassemble the cup: When you decide to wash the cup, every part should be disassembled. As previously stated, the grooves are where the food and milk particles accumulate the most. These are the most common places where germs can multiply. Thorough cleaning means that we should have access to all parts.
The first thing that you will probably have to remove is the straw. Once that is done, remove the lid and look underneath it. A rubber ring or stopper will usually be used to make the lid leakproof. Remove this and keep it aside as well. Do not pull out any parts that are glued to the lid.
Cleaning the cup: There are a couple of methods you can use to clean the cup thoroughly. The easiest of these is to soak the parts of the cup in hot soapy water. Fill a basin or vessel with ample water to soak the cup and the parts completely. Leave the parts to soak completely; the longer, the better. This will soften some of the gunk and make it easier to cleanout. Avoid using a sponge when scrubbing the sippy cup as they are known to harbor bacteria.
Do not use the sponge you use for the other utensils in the house. Instead, we recommend using a bottle brush or a clean cloth to get the job done. Smaller, hard-to-reach places like the spout can be cleaned with a nipple or teat brush. Use a straw brush for the straw, if it has one. Be extremely thorough, as residual fluid can lead to germs. These germs can cause diseases when your baby uses the sippy cup again.
The second method is an alternative if you do not have a bottle brush handy. The sippy cup can also be thoroughly cleaned by making an agitator pour into the cup. This is a method that our grandmothers used to follow quite often. Throw in a handful of uncooked rice into the cup, along with some vinegar and water. Shake this vigorously, and the rice will act as an abrasive, removing all the gunk from inside the cup.
Vinegar helps to remove any smell in the sippy cup. Take care to use a small amount of vinegar because it can erode the plastic. If you are using a sippy cup that is not certified BPA- or EA-free (why would you, when you have Niniobaby’s quality product), try to avoid using vinegar. Use rice and water alone.
Sterilizing sippy cups
Sterilizing baby bottles and sippy cups are essential. This step can remove much of the bacteria and other microorganisms in them. You do not need to sterilize the cup after every use. However, you must often sterilize your baby’s sippy cups to ensure they are safe for your baby. This could keep your baby safe from many disease-causing germs.
The three effective methods for sterilizing sippy cups are:
- Boil
- Use a sterilizer
- Bleach
Boil: Place all the sippy cup parts into a vessel full of boiling water. Allow the parts to sit in the boiling water for about 10 minutes. Boiling is an effective way of removing germs as they will not survive in high-heat environments. However, you must take care to remove the bottle and its parts after ten minutes. Do not remove them with bare hands.
Use a sterilizer: Many sterilizers are available for baby bottles that can be used for sippy cups. These sterilizers are usually steam-based and will emit high-temperature steam to kill mold spores and bacteria.
Bleach: Bleach is an effective way to kill mold spores, and so are vinegar and tea tree oil. Sanitize the sippy cup by mixing two teaspoons of bleach with about four liters of water. Drip-dry the cups after they have been let soak for about two minutes. Ensure to rinse the cup with soapy water after this, as the bleach should be washed away thoroughly.
Storing your child’s sippy cups
Whichever method you are using for cleaning or sterilizing, make sure that they are never stored while still having moisture. For example, if you reassemble your cups before they are completely dry, the moisture gets trapped within, thus increasing the probability of mold growth.
Sippy cups should be dried on a rack. Do not use a towel for drying them off as they can also harbor bacteria. However, you can use fresh tissues and newly washed towels to dry them before storing them in a cold and dry place.
Change your child’s sippy cup every three months to prevent mold growth. After all, the safety of the child is most important. If a cup has a stain that is particularly difficult to remove or remains stained after washing, it is advisable to throw it in the trash. While it is difficult to tell if there will be live spores, it is always better to be safe than sorry.
Wrapping Up
Niniobaby’s sippy cups feature no-drip caps and BPA-free plastic bodies that promise to keep your child safe. The material and design minimize the mess around the house because of spills. The problem you face with most sippy cups is the same- residue in the straws, valves, and other parts.
The no-drip cap needs thorough cleaning after every use. The beading or rubber stopper results in small crevices just under the lid. These hard-to-reach places can be a breeding ground for many mildew and germs.
The caps also tend to have a small plastic or silicone disc inserted underneath. While this design helps further make the cap drip-proof, it also traps the liquid within. This trapped liquid becomes a zone for microorganisms.
Can you be more specific about the content of your article? After reading it, I still have some doubts. Hope you can help me.
Thanks for sharing. I read many of your blog posts, cool, your blog is very good.
Xerostomia is also observed in other kinds of antidepressants monoamine oxidase inhibitors, tricyclics, heterocyclics, and others and antipsychotics, many of which are anticholinergic agents 5 cialis and priligy
isordil oxytetracycline injection 30ml Fitch said its sensitivity analysis shows a 1 percentparallel rise in interest rates would lead to an immediate 16percent decline in asset value for funds that have portfoliodurations of more than 10 years, which is more than 71 percentof funds in the sector emla cream and priligy tablets
Thanks for sharing. I read many of your blog posts, cool, your blog is very good.
One of its first determinations was that same sex couples would be covered by the Family Medical Leave Act [url=https://fastpriligy.top/]priligy without prescription[/url] Zhao Ling looked at Hei Jiaolong with a condensed expression on his face, and said in a low voice, Dragon Fury
Unwanted effects, which Lexapro may cause, usually appear within the first few weeks; they are characterized by mild to moderate severity, and pass during the therapy with the antidepressant how to buy cytotec no prescription
Can Ova- mit be taken or consumed while pregnant generic cytotec without dr prescription The first weeks are tougher, then it becomes easier
BWER sets the standard for weighbridge excellence in Iraq, offering innovative, reliable systems and dedicated support to ensure optimal performance and client satisfaction.
Ищите в гугле
UID_74743238###
Ini dia! 🎉🎉 ASN BKN Ubah Pola Kerja yang baru dan efisien! 🎉🎉.
UID_83344528###
Inilah 🎉🎉 Pupuk Inovatif Kebun Riset Kujang yang bikin Wamen BUMN bangga! 💪🏻🇮🇩
UID_21891068###
Takjub 😮 dengan fenomena serbu gas? Yuk, baca Warung Tatang Diserbu Warga dan temukan faktanya! 🕵️♀️👀
UID_25978847###
situs terbaik hanya di slot gacor agentotoplay
UID_95859078###
Baru-baru ini, para pemain Mahjong Wins 3 dikejutkan dengan bocoran RTP yang diklaim bisa meningkatkan peluang kemenangan secara signifikan. Banyak yang percaya bahwa informasi ini membantu mereka mendapatkan hasil yang lebih konsisten dalam permainan. Jika Anda ingin tahu lebih lanjut, cek bocoran RTP Mahjong Wins 3 hari ini dan lihat apakah strategi ini benar-benar efektif.
UID_57331425###
Skandal terbaru mengguncang komunitas pecinta game slot setelah seorang admin terkenal, Rachel, dikabarkan tertangkap membocorkan pola kemenangan Gate of Olympus. Banyak yang bertanya-tanya apakah informasi ini benar-benar akurat atau hanya sekadar rumor yang beredar di kalangan pemain. Simak lebih lanjut detailnya dalam artikel admin Rachel tertangkap bocorkan pola Gate of Olympus.
UID_17136916###
Kisah inspiratif datang dari seorang tukang ojek online asal Tangerang yang berhasil membawa pulang hadiah fantastis setelah bermain Mahjong Ways 2. Dengan modal kecil, ia sukses mengubah nasibnya dan meraih kemenangan besar senilai 200 juta rupiah. Penasaran bagaimana caranya? Simak kisah lengkapnya di artikel tukang ojek online menang 200 juta dari Mahjong Ways 2.
UID_87427935###
Cek yuk! 🚍👮♂️Operasi Keselamatan 2025 Polres Ciamis Siapa tahu bus favoritmu jadi sasaran! 😱👍
UID_18563832###
Ini yang di ganti >>> Yuk, ketahui lebih lanjut tentang Syarat Gabung OECD dan Pentingnya Ratifikasi Konvensi Antisuap di sini! 🕵️♀️🔎📚.
UID_83003169###
Kenalan yuk! 🤝 Dengan guru inspiratif ini, Guru Dede Sulaeman yang mengajarkan cara merapikan pakaian di kelasnya. 👕👚🎓
UID_97211224###
Yuk, sehat bersama! 👨⚕️👩⚕️ Cek kondisi tubuh kamu di Program Cek Kesehatan Gratis sekarang juga! 💉🌡️ Selalu jaga kesehatan, ya! 🏥💖
Thanks for sharing. I read many of your blog posts, cool, your blog is very good.
Link exchange is nothing else but it is only placing the other person’s blog link on your page at proper place and other person will also do same for you.
профиль с подписчиками платформа для покупки аккаунтов
маркетплейс аккаунтов соцсетей
платформа для покупки аккаунтов маркетплейс аккаунтов
платформа для покупки аккаунтов маркетплейс аккаунтов соцсетей
безопасная сделка аккаунтов услуги по продаже аккаунтов
продажа аккаунтов гарантия при продаже аккаунтов
аккаунт для рекламы безопасная сделка аккаунтов
продажа аккаунтов соцсетей birzha-accauntov.ru/
купить аккаунт с прокачкой маркетплейс аккаунтов соцсетей
заработок на аккаунтах маркетплейс аккаунтов соцсетей
маркетплейс аккаунтов https://marketplace-akkauntov-top.ru
услуги по продаже аккаунтов продажа аккаунтов соцсетей
купить аккаунт продажа аккаунтов
профиль с подписчиками продажа аккаунтов
аккаунт для рекламы https://kupit-akkaunt-top.ru/
аккаунт для рекламы https://pokupka-akkauntov-online.ru/
Account Store Accounts market
Account Trading Platform Account trading platform
Account exchange Website for Selling Accounts
Account trading platform https://buyaccountsmarketplace.com/
Sell Account Buy and Sell Accounts
Account Trading Account Trading Platform
Accounts market Account Selling Platform
Sell accounts Account Selling Service
Accounts marketplace Database of Accounts for Sale
Account Trading Platform Ready-Made Accounts for Sale
account sale profitable account sales
social media account marketplace account store
buy account account trading
account acquisition sell accounts
sell accounts account buying platform
database of accounts for sale sell accounts
account market account acquisition
account acquisition account marketplace
accounts for sale account marketplace
sell account account trading platform
accounts for sale accounts marketplace
website for buying accounts online account store
marketplace for ready-made accounts secure account purchasing platform
buy account account purchase
account buying service account buying service
account buying service account selling platform
buy pre-made account buy and sell accounts
account exchange service database of accounts for sale
accounts market website for selling accounts
account exchange account exchange service
account exchange service buy accounts
profitable account sales account purchase
account trading service account trading platform
find accounts for sale database of accounts for sale
sell pre-made account sell pre-made account
account acquisition buy pre-made account
account store accounts-marketplace.xyz
account catalog buy-best-accounts.org
sell pre-made account social-accounts-marketplaces.live
accounts for sale https://accounts-marketplace.live
gaming account marketplace https://social-accounts-marketplace.xyz
account market https://buy-accounts.space
sell accounts https://buy-accounts-shop.pro
account trading https://buy-accounts.live/
account purchase https://social-accounts-marketplace.live/
social media account marketplace https://accounts-marketplace.online
purchase ready-made accounts https://accounts-marketplace-best.pro/
биржа аккаунтов https://akkaunty-na-prodazhu.pro
продать аккаунт https://rynok-akkauntov.top
покупка аккаунтов kupit-akkaunt.xyz
магазин аккаунтов https://akkaunt-magazin.online/
маркетплейс аккаунтов https://akkaunty-market.live/
маркетплейс аккаунтов https://kupit-akkaunty-market.xyz/
продать аккаунт https://akkaunty-optom.live/
магазин аккаунтов https://online-akkaunty-magazin.xyz
продать аккаунт https://akkaunty-dlya-prodazhi.pro
продать аккаунт https://kupit-akkaunt.online
facebook accounts for sale https://buy-adsaccounts.work/
buy fb ad account https://buy-ad-accounts.click
buying facebook account https://buy-ad-account.top
buy facebook advertising https://buy-ads-account.click
buy facebook accounts cheap https://ad-account-buy.top/
buy facebook old accounts https://buy-ads-account.work
buy fb account https://ad-account-for-sale.top
Этот информационный материал привлекает внимание множеством интересных деталей и необычных ракурсов. Мы предлагаем уникальные взгляды на привычные вещи и рассматриваем вопросы, которые волнуют общество. Будьте в курсе актуальных тем и расширяйте свои знания!
Подробнее – https://medalkoblog.ru/
buy facebook advertising buy facebook account for ads
facebook ad account buy https://ad-accounts-for-sale.work
buy google ads verified account https://buy-ads-account.top/
buy account google ads https://buy-ads-accounts.click
facebook ad account for sale facebook account buy
sell google ads account google ads accounts
buy google ad threshold account https://ads-account-buy.work
buy google ad account https://buy-ads-invoice-account.top
buy account google ads https://buy-account-ads.work
sell google ads account google ads agency accounts
buy google ads buy verified google ads accounts
buy adwords account google ads reseller
buy facebook business manager https://buy-business-manager.org
buy google ads invoice account https://buy-verified-ads-account.work
facebook business manager account buy buy-business-manager-acc.org
buy facebook verified business account https://business-manager-for-sale.org/
buy facebook bm https://buy-business-manager-verified.org/
buy verified facebook https://buy-bm.org
buy facebook business manager account https://buy-business-manager-accounts.org/
buy tiktok ad account https://buy-tiktok-ads-account.org
buy tiktok ads accounts https://tiktok-ads-account-buy.org
buy tiktok ad account tiktok ads agency account
buy tiktok ad account https://tiktok-agency-account-for-sale.org
buy tiktok business account https://buy-tiktok-ad-account.org
buy tiktok ads accounts https://buy-tiktok-ads-accounts.org
tiktok ads account for sale https://tiktok-ads-agency-account.org
tiktok ad accounts https://buy-tiktok-business-account.org
Затяжной запой — это состояние, при котором человек в течение нескольких дней не может прекратить употребление алкоголя без медицинской помощи. Такое состояние чревато тяжёлыми нарушениями в работе внутренних органов и психики. В Новосибирске и Новосибирской области доступен профессиональный вывод из запоя как на дому, так и в условиях стационара. Подход к лечению индивидуален, и основная цель — безопасно и эффективно устранить последствия интоксикации и предотвратить рецидив.
Углубиться в тему – [url=https://narko-zakodirovan2.ru/]вывод из запоя на дому круглосуточно в новосибирске[/url]
tiktok agency account for sale https://buy-tiktok-ads.org
Показана в тяжёлых случаях или при наличии сопутствующих заболеваний. Лечение проходит под круглосуточным наблюдением врачей и медсестёр с постоянной корректировкой терапии.
Выяснить больше – https://narko-zakodirovan2.ru/vyvod-iz-zapoya-na-domu-novosibirsk/
Врач может приехать в течение 1–2 часов после обращения. В стационар возможна экстренная госпитализация в тот же день.
Детальнее – [url=https://narko-zakodirovan2.ru/]narko-zakodirovan2.ru/[/url]
Вывод из запоя может осуществляться в двух форматах — на дому и в стационаре. Выбор зависит от степени интоксикации, наличия осложнений и возможности обеспечить пациенту наблюдение в домашних условиях.
Подробнее – http://narko-zakodirovan2.ru/vyvod-iz-zapoya-czena-novosibirsk/
Вывод из запоя может осуществляться в двух форматах — на дому и в стационаре. Выбор зависит от степени интоксикации, наличия осложнений и возможности обеспечить пациенту наблюдение в домашних условиях.
Выяснить больше – https://narko-zakodirovan2.ru/vyvod-iz-zapoya-czena-novosibirsk/
Затяжной запой — это состояние, при котором человек в течение нескольких дней не может прекратить употребление алкоголя без медицинской помощи. Такое состояние чревато тяжёлыми нарушениями в работе внутренних органов и психики. В Новосибирске и Новосибирской области доступен профессиональный вывод из запоя как на дому, так и в условиях стационара. Подход к лечению индивидуален, и основная цель — безопасно и эффективно устранить последствия интоксикации и предотвратить рецидив.
Подробнее тут – [url=https://narko-zakodirovan2.ru/]вывод из запоя на дому цена[/url]
Обращение к наркологу позволяет избежать типичных ошибок самолечения и достичь стабильного результата. Квалифицированное вмешательство:
Исследовать вопрос подробнее – [url=https://narko-zakodirovan2.ru/]вывод из запоя круглосуточно новосибирск[/url]
Обращение к наркологу позволяет избежать типичных ошибок самолечения и достичь стабильного результата. Квалифицированное вмешательство:
Подробнее можно узнать тут – http://narko-zakodirovan2.ru
Обращение к наркологу позволяет избежать типичных ошибок самолечения и достичь стабильного результата. Квалифицированное вмешательство:
Подробнее тут – [url=https://narko-zakodirovan2.ru/]вывод из запоя недорого в новосибирске[/url]
Обращение к наркологу позволяет избежать типичных ошибок самолечения и достичь стабильного результата. Квалифицированное вмешательство:
Узнать больше – [url=https://narko-zakodirovan2.ru/]вывод из запоя цена новосибирск.[/url]
Обращение к наркологу позволяет избежать типичных ошибок самолечения и достичь стабильного результата. Квалифицированное вмешательство:
Подробнее можно узнать тут – [url=https://narko-zakodirovan2.ru/]вывод из запоя цена новосибирская область[/url]
Решение обратиться к врачу должно быть принято, если:
Углубиться в тему – [url=https://narko-zakodirovan2.ru/]вывод из запоя в стационаре новосибирск[/url]
Решение обратиться к врачу должно быть принято, если:
Узнать больше – [url=https://narko-zakodirovan2.ru/]вывод из запоя капельница новосибирск[/url]
Врач может приехать в течение 1–2 часов после обращения. В стационар возможна экстренная госпитализация в тот же день.
Изучить вопрос глубже – [url=https://narko-zakodirovan2.ru/]наркология вывод из запоя в новосибирске[/url]
Затяжной запой — это состояние, при котором человек в течение нескольких дней не может прекратить употребление алкоголя без медицинской помощи. Такое состояние чревато тяжёлыми нарушениями в работе внутренних органов и психики. В Новосибирске и Новосибирской области доступен профессиональный вывод из запоя как на дому, так и в условиях стационара. Подход к лечению индивидуален, и основная цель — безопасно и эффективно устранить последствия интоксикации и предотвратить рецидив.
Узнать больше – [url=https://narko-zakodirovan2.ru/]нарколог вывод из запоя в новосибирске[/url]
Затяжной запой — это состояние, при котором человек в течение нескольких дней не может прекратить употребление алкоголя без медицинской помощи. Такое состояние чревато тяжёлыми нарушениями в работе внутренних органов и психики. В Новосибирске и Новосибирской области доступен профессиональный вывод из запоя как на дому, так и в условиях стационара. Подход к лечению индивидуален, и основная цель — безопасно и эффективно устранить последствия интоксикации и предотвратить рецидив.
Углубиться в тему – [url=https://narko-zakodirovan2.ru/]вывод из запоя в стационаре[/url]
Затяжной запой — это состояние, при котором человек в течение нескольких дней не может прекратить употребление алкоголя без медицинской помощи. Такое состояние чревато тяжёлыми нарушениями в работе внутренних органов и психики. В Новосибирске и Новосибирской области доступен профессиональный вывод из запоя как на дому, так и в условиях стационара. Подход к лечению индивидуален, и основная цель — безопасно и эффективно устранить последствия интоксикации и предотвратить рецидив.
Получить дополнительную информацию – [url=https://narko-zakodirovan2.ru/]вывод из запоя клиника в новосибирске[/url]
Показана в тяжёлых случаях или при наличии сопутствующих заболеваний. Лечение проходит под круглосуточным наблюдением врачей и медсестёр с постоянной корректировкой терапии.
Углубиться в тему – [url=https://narko-zakodirovan2.ru/]наркология вывод из запоя[/url]
Показана в тяжёлых случаях или при наличии сопутствующих заболеваний. Лечение проходит под круглосуточным наблюдением врачей и медсестёр с постоянной корректировкой терапии.
Получить дополнительную информацию – https://narko-zakodirovan2.ru/vyvod-iz-zapoya-kruglosutochno-novosibirsk
Решение обратиться к врачу должно быть принято, если:
Углубиться в тему – [url=https://narko-zakodirovan2.ru/]вывод из запоя капельница в новосибирске[/url]
Врач может приехать в течение 1–2 часов после обращения. В стационар возможна экстренная госпитализация в тот же день.
Подробнее – https://narko-zakodirovan2.ru/vyvod-iz-zapoya-kruglosutochno-novosibirsk
Решение обратиться к врачу должно быть принято, если:
Детальнее – http://narko-zakodirovan2.ru
Решение обратиться к врачу должно быть принято, если:
Исследовать вопрос подробнее – https://narko-zakodirovan2.ru/vyvod-iz-zapoya-kruglosutochno-novosibirsk/
Затяжной запой — это состояние, при котором человек в течение нескольких дней не может прекратить употребление алкоголя без медицинской помощи. Такое состояние чревато тяжёлыми нарушениями в работе внутренних органов и психики. В Новосибирске и Новосибирской области доступен профессиональный вывод из запоя как на дому, так и в условиях стационара. Подход к лечению индивидуален, и основная цель — безопасно и эффективно устранить последствия интоксикации и предотвратить рецидив.
Получить больше информации – https://narko-zakodirovan2.ru/
Решение обратиться к врачу должно быть принято, если:
Получить больше информации – http://narko-zakodirovan2.ru
Затяжной запой — это состояние, при котором человек в течение нескольких дней не может прекратить употребление алкоголя без медицинской помощи. Такое состояние чревато тяжёлыми нарушениями в работе внутренних органов и психики. В Новосибирске и Новосибирской области доступен профессиональный вывод из запоя как на дому, так и в условиях стационара. Подход к лечению индивидуален, и основная цель — безопасно и эффективно устранить последствия интоксикации и предотвратить рецидив.
Детальнее – [url=https://narko-zakodirovan2.ru/]вывод из запоя капельница новосибирск[/url]
Вывод из запоя может осуществляться в двух форматах — на дому и в стационаре. Выбор зависит от степени интоксикации, наличия осложнений и возможности обеспечить пациенту наблюдение в домашних условиях.
Детальнее – https://narko-zakodirovan2.ru/vyvod-iz-zapoya-na-domu-novosibirsk
Затяжной запой — это состояние, при котором человек в течение нескольких дней не может прекратить употребление алкоголя без медицинской помощи. Такое состояние чревато тяжёлыми нарушениями в работе внутренних органов и психики. В Новосибирске и Новосибирской области доступен профессиональный вывод из запоя как на дому, так и в условиях стационара. Подход к лечению индивидуален, и основная цель — безопасно и эффективно устранить последствия интоксикации и предотвратить рецидив.
Ознакомиться с деталями – [url=https://narko-zakodirovan2.ru/]наркология вывод из запоя новосибирск[/url]
Решение обратиться к врачу должно быть принято, если:
Подробнее можно узнать тут – [url=https://narko-zakodirovan2.ru/]вывод из запоя цена в новосибирске[/url]
Обращение к наркологу позволяет избежать типичных ошибок самолечения и достичь стабильного результата. Квалифицированное вмешательство:
Разобраться лучше – [url=https://narko-zakodirovan2.ru/]наркология вывод из запоя новосибирск[/url]
Врач может приехать в течение 1–2 часов после обращения. В стационар возможна экстренная госпитализация в тот же день.
Ознакомиться с деталями – [url=https://narko-zakodirovan2.ru/]вывод из запоя недорого в новосибирске[/url]
Обращение к наркологу позволяет избежать типичных ошибок самолечения и достичь стабильного результата. Квалифицированное вмешательство:
Узнать больше – https://narko-zakodirovan2.ru/vyvod-iz-zapoya-na-domu-novosibirsk
Затяжной запой — это состояние, при котором человек в течение нескольких дней не может прекратить употребление алкоголя без медицинской помощи. Такое состояние чревато тяжёлыми нарушениями в работе внутренних органов и психики. В Новосибирске и Новосибирской области доступен профессиональный вывод из запоя как на дому, так и в условиях стационара. Подход к лечению индивидуален, и основная цель — безопасно и эффективно устранить последствия интоксикации и предотвратить рецидив.
Ознакомиться с деталями – [url=https://narko-zakodirovan2.ru/]вывод из запоя на дому новосибирск.[/url]
Обращение к наркологу позволяет избежать типичных ошибок самолечения и достичь стабильного результата. Квалифицированное вмешательство:
Получить больше информации – [url=https://narko-zakodirovan2.ru/]наркологический вывод из запоя новосибирск[/url]
Beginners normally begin with 200–300 mg per week, whereas skilled customers could use higher doses (up to 500 mg weekly).
It’s necessary to divide doses evenly throughout the week and observe
a structured cycle. Stacking Tren with Sustanon is a nice way
to extend your muscle mass with out problems with water retention. Estrogen encourages the formation of fats
cells, leading to larger levels of body fat and man breasts.
It’s a favourite amongst newbies and seasoned athletes alike due to its gentle nature
and spectacular outcomes. Anavar works by growing your body’s capacity to
retain nitrogen, which is important for muscle preservation during
a calorie deficit. This means you can burn fats while preserving your muscles full and powerful.
Anvarol enhances phosphocreatine levels of muscle mass and
hence leads to elevated ATP manufacturing.
Winstrol, in this regard, is the opposite of Deca
Durabolin, which may actually improve joint health due to increased manufacturing of synovial fluid.
The benefit of water loss is a extra ripped appearance due
to less extracellular fluid obscuring muscle definition. TUDCA is an FDA-approved therapy for varied cholestatic liver ailments (2).
In the short time period, we see this causing irritation and ALT/AST enzymes to rise.
Commonly often recognized as Oxandrolone, this steroid is suitable for both men and
women. Hyperthermia can end result in a breakdown of essential enzymes in your body.
Additionally, based on a 2016 case report, hyperthermia also can result in organ failure.
According to the FDA, in 2003, one online vendor was sentenced
to 5 years in jail after considered one of his prospects died from DNP
use. Nevertheless, a 2018 study confirmed that the sale
of DNP is prohibited all over the world, and DNP has never been accredited by the FDA.
When ingested, it acts on constructions inside every of your cells
known as mitochondria.
Understanding the function of steroids in fat
burning requires a nuanced approach, balancing the potential benefits with the identified dangers.
This article aims to demystify fats burning steroids, exploring their
mechanism, benefits, and the precautions one ought to take
when contemplating their use. The answer lies in a mix of a
nutritious diet and regular exercise. Firstly, it’s important
to note that taking steroids doesn’t immediately burn body fat.
L-tryptophan is an important amino acid, meaning the physique can not produce
it by itself, and thus it have to be consumed through a person’s food plan. We have found Trenbolone to trigger
paranoia and nervousness in delicate customers via its
stimulation of the central nervous system and thus shifting the physique into fight-or-flight
mode. This arousing impact attributable to elevated
adrenaline output may result in insomnia. Nevertheless, trenbolone does enhance progesterone, a unique
feminine intercourse hormone, which might
additionally lead to gynecomastia. We usually see trenbolone inflicting notable
muscle hypertrophy (size) within the trapezius and deltoids, because of these muscles having
extra androgen receptors current and thus being extra vulnerable to progress.
It will be the most potent fat-burning compound too, with few AAS capable of rival its androgenic and thermogenic
properties.
Steroids, also called anabolic-androgenic steroids, are
synthetic derivatives of the male hormone testosterone.
They work by stimulating muscle development and rising protein synthesis, which outcomes
in an increase in muscle mass and strength. Steroids may
be taken orally or injected, and they’re typically utilized
by athletes and bodybuilders to enhance their physical efficiency and look.
Fat loss throughout a steroid cycle requires the right combination of steroids,
food regimen, and training. Compounds like Winstrol, Anavar, and Clenbuterol
are best for slicing cycles, serving to to protect lean muscle
mass whereas burning fats. Nonetheless, attaining optimal fat loss also is dependent upon a caloric
deficit, power coaching, and proper supplementation. Amongst the best options at present are legal steroid alternatives—a
new class of natural bodybuilding supplements designed
to deliver fast results without the side effects of anabolic steroids.
They alter the body’s internal setting (electrolyte imbalance and water retention).
This process mixed with nutritious diet, cardio exercises, and weight coaching, automatically results in fat loss.
Having used bulking steroids like Trenbolone
or Dianabol usually makes these bodybuilders placed on loads of unwanted fat, apart from elevated water retention. I pinned 75mg every four
days of tren and pinned 300 susta, no pip and every thing pins actually clean. Calories are burning,
mixed with gaining some muscle at the similar time i
feel in a month i went from 196lbs to 190lbs whereas still holding more muscle.
It gave me a nice feeling before mattress
particularly, just warm in the sense of my body wanting to sleep.
Identical for the T3, metabolism definitely increased and I am very happy with
the products of osgear.
I need to emphasize that using Anavar, a C17-alpha alkylated (C17-aa) anabolic steroids prescription, Robyn, steroid, carries a high degree of hepatotoxicity.
It is essential to use a liver assist complement and abstain from
alcohol consumption to minimize the danger of liver injury.
Additionally, stacking Anavar with other performance-enhancing drugs or supplements ought to be avoided,
as it can enhance the chance of unwanted aspect effects.
Nevertheless, in bodybuilding dosages, Winstrol can increase progesterone,
a female sex hormone that may potentially cause gynecomastia.
In phrases of security, we see testosterone in the off-season causing considerably much less damage to the heart in addition to offering higher muscle hypertrophy and strength (4,
5). Subsequently, Winstrol typically isn’t an appropriate steroid for girls if they wish to
remain trying and sounding like ladies. The solely exception to that is if very small
doses of Winstrol are taken.
You mustn’t use WIN-MAX in case you are nursing, pregnant or planning
to get pregnant within the near future. If you’re presently taking prescription medicine
or have a long-term health problem, it is necessary that you just focus on your therapy options with a
certified medical professional. We’ll additionally discover actual person results,
components, security, and the science behind how these authorized alternate options work.
If you’re seeking to take your physique to the following level—safely
and legally—you’re in the proper place.
Testosterone can be an effective chopping agent; nevertheless,
fluid retention can accumulate (unless an anti-estrogen is taken).
I think this is one of the most significant information for me. And i am glad reading your article. But want to remark on few general things, The web site style is wonderful, the articles is really excellent : D. Good job, cheers
Way cool! Some extremely valid points! I appreciate you penning this write-up and the rest of the site is very good.
For the reason that the admin of this website is working, no question very shortly it will be famous, due to its feature contents.
My programmer is trying to persuade me to move to .net from PHP. I have always disliked the idea because of the expenses. But he’s tryiong none the less. I’ve been using WordPress on a variety of websites for about a year and am nervous about switching to another platform. I have heard good things about blogengine.net. Is there a way I can transfer all my wordpress content into it? Any help would be greatly appreciated!
¡Saludos, cazadores de fortuna !
Casinosextranjerosenespana.es – Bonos y rankings – https://www.casinosextranjerosenespana.es/# п»їcasinos online extranjeros
¡Que vivas increíbles victorias épicas !
¡Hola, cazadores de oportunidades!
Casino por fuera para jugar 24/7 – https://www.casinoonlinefueradeespanol.xyz/ casinoonlinefueradeespanol.xyz
¡Que disfrutes de asombrosas botes impresionantes!
¡Saludos, seguidores del triunfo !
Tips de seguridad en casinoextranjerosenespana.es – https://casinoextranjerosenespana.es/# casinoextranjerosenespana.es
¡Que disfrutes de instantes irrepetibles !
¡Saludos, entusiastas de la aventura !
casinosextranjero.es – bonos sin rollover – https://www.casinosextranjero.es/# п»їcasinos online extranjeros
¡Que vivas increíbles jackpots extraordinarios!
I’m amazed, I have to admit. Rarely do I encounter a blog that’s both equally educative and entertaining, and let me tell you, you have hit the nail on the head. The issue is an issue that not enough people are speaking intelligently about. Now i’m very happy that I stumbled across this during my search for something concerning this.
¡Bienvenidos, cazadores de tesoros !
Casino por fuera con bonos de bienvenida Гєnicos – https://www.casinoporfuera.guru/ casino por fuera
¡Que disfrutes de maravillosas movidas brillantes !
¡Hola, buscadores de fortuna !
Casinos online extranjeros con juegos en vivo 24/7 – https://www.casinoextranjero.es/# mejores casinos online extranjeros
¡Que vivas giros exitosos !
¡Saludos, entusiastas del azar !
casino por fuera con ruleta sin cero – п»їhttps://casinosonlinefueraespanol.xyz/ casino por fuera
¡Que disfrutes de rondas vibrantes !
Heya i’m for the first time here. I found this board and I to find It really useful & it helped me out a lot. I hope to present one thing back and aid others such as you helped me.
¡Hola, jugadores expertos !
casinosextranjerosdeespana.es – diversiГіn garantizada – п»їhttps://casinosextranjerosdeespana.es/ mejores casinos online extranjeros
¡Que vivas increíbles jackpots sorprendentes!
¡Bienvenidos, buscadores de fortuna !
casinofueraespanol: plataforma internacional confiable – https://www.casinofueraespanol.xyz/# casinos fuera de espaГ±a
¡Que vivas increíbles conquistas brillantes !
Your way of telling the whole thing in this article is truly pleasant, all be capable of without difficulty understand it, Thanks a lot.
Greetings from Colorado! I’m bored at work so I decided to check out your blog on my iphone during lunch break. I love the info you present here and can’t wait to take a look when I get home. I’m shocked at how fast your blog loaded on my phone .. I’m not even using WIFI, just 3G .. Anyways, great blog!
Oh my goodness! Incredible article dude! Thank you, However I am experiencing issues with your RSS. I don’t know the reason why I am unable to join it. Is there anybody having identical RSS problems? Anyone that knows the answer can you kindly respond? Thanx!!
My brother recommended I might like this website. He was entirely right. This post actually made my day. You cann’t imagine just how much time I had spent for this info! Thanks!
Hi, I do think this is a great blog. I stumbledupon it 😉 I will revisit yet again since i have bookmarked it. Money and freedom is the best way to change, may you be rich and continue to help others.
Your style is very unique compared to other people I have read stuff from. Thanks for posting when you have the opportunity, Guess I will just book mark this page.
I do not even understand how I ended up right here, but I believed this publish was once good. I don’t realize who you’re however certainly you are going to a famous blogger if you happen to are not already. Cheers!
My brother recommended I might like this web site. He was entirely right. This post actually made my day. You cann’t imagine just how much time I had spent for this info! Thanks!
Hiya very nice site!! Man .. Excellent .. Wonderful .. I will bookmark your web site and take the feeds additionally? I am happy to search out a lot of helpful information right here within the post, we’d like develop extra strategies on this regard, thank you for sharing. . . . . .